Saturday, 28 April 2018

UCA collodion sessions for 2018. Best Hats Yet!

I've just finished the third day of workshop/demos for UCA students. We made some great plates, thanks to a wonderful new (actually 100 year old) portrait lens, good weather and most importantly some creative, enthusiastic and inventive people who really got into the spirit of things. Thanks to everyone for making these: a real team effort as always.

The first day was for year 2 BA Photography. Here are the plates. Mostly half-plate ambrotypes:


Sadly Emily's last plate, a whole plate tintype fell victim to the old collodion shrinking as it dried. The odd thing was that we made a couple of other whole plates and they didn't peel. Maybe too long 'setting up' between the pour and the silver nitrate? I'm not sure but it's a reminder of how fickle this process can be. The learning curve is endless.


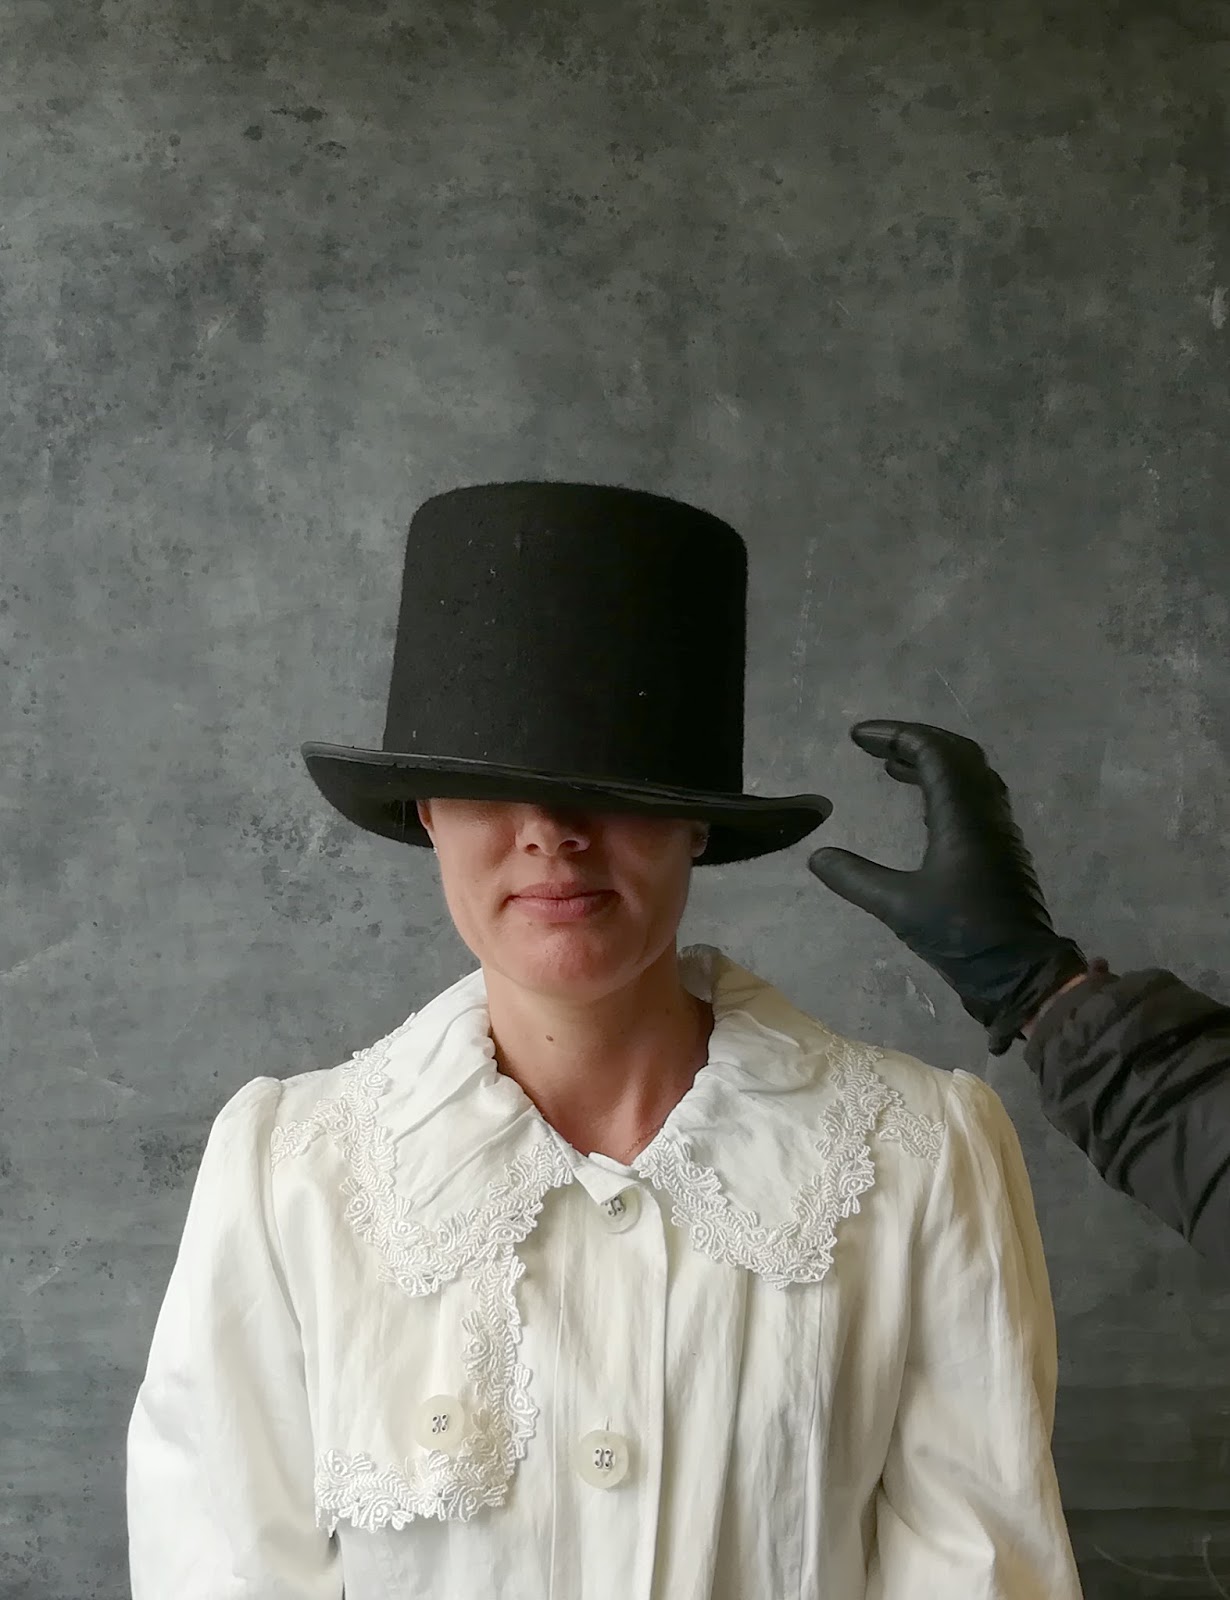
The next session was for MFA students. Corinne brought some great dressing up stuff and everyone made a real effort to transform themselves for the camera:


The set-up in the finishing room: Note the head brace to help the sitter keep still. (photo: Hayden Wilde)


Corinne has a go at pouring a plate. I was impressed with everyone's skill at this tricky operation. (photo: Hayden Wilde)


The hat needed a little adjustment! (photo: Hayden Wilde) 

Su Ji posing for the 12"x15" plate camera. Note how the orange feathers record as black in the Ambrotype. (photo: Hayden Wilde)


Hayden was the super-assistant for these shoots. We made this whole plate tintype as a small token of thanks.

The following day, the remainder of the MFA people came for their session. Again, some great hats, inventive use of props and original styling and poses:


The mirror Danielle is holding has solarised: - a beautiful effect.


Thanks to everyone who took part. Looking at the smiles in all the production shots it's clear you all enjoyed it as much as I did.

Thanks once again to Hayden. His hard work and super-efficiency were very much appreciated.

Thursday, 12 April 2018

A Cure for Old Age! - (for collodion at least).

Collodion doesn't have a great shelf life. Even if kept in the fridge it deteriorates over time.  As the solution ages, it darkens in the bottle from a light straw colour to a deeper orange, almost red.  Old 'red' collodion can still be useable but the sensitivity is generally much reduced and the contrast is higher.  Some people use it to their advantage, using red collodion when they need more contrast or mix it with fresher solution for a custom coating but most of us accept that like conventional photo chemicals it is best to use the stuff up before it goes 'off'.

Recently however I've come across a couple of references to the use of acetone to resurrect old collodion. Quinn Jacobson mentions it and there's a great account on the Collodion User's forum by Tara Oliphant (www.derivedlogic.com)  which recommends using 0.5ml of acetone per 75ml of collodion to restore it. This works out as 6.66ml per litre or 0.0066%. - say .007% for the real world.

As I've got various bottles of elderly stuff lurking in the fridge I tried it. 

The old, red collodion I tested is some of John Brewer's own-recipe positive stuff which must be at least a year if not two years old. (dating the bottles when they are new is a good idea) It's been stored in a fridge at approx. +5deg. C and it still works, though it tends to crack and flake sometimes on larger plates (it's noticeably thicker when pouring).

As per the recipe I added 1.7ml (should be 1.66ml but that's hard to measure accurately!) of acetone to 250ml of collodion. This is a tiny amount: less than 1%of the volume. I doubted anything much would happen but after only an hour the colour had already improved!
After 1 hour the acetone has already lightened the collodion...
Another 9 days in the fridge and it looked almost brand new.  I'd expect the conversion to be quicker if the stuff is left at room temperature but I prefer to keep it safely stored in the airtight fridge.
After 9 days (in the fridge) the treated collodion has reverted to its original colour

Testing.

Side by side tests made under the same lighting conditions - or as best I could in daylight. flash is more consistent but I seldom use it in my wet plate work and I wanted a relevant test result.
For the record these are quarter plates and the lens is my 5" magic lantern petzval.

I established the best exposure for the old red collodion as 6 seconds at f/3.  I kept the exposure the same for the treated collodion (it was a dull day and the light was pretty stable) Here are both plates:
untreated old 'red' collodion. 6 sec f3
same collodion treated with acetone. 6 seconds f3
Interestingly, even though older collodion is supposedly more contrasty the treated stuff has better range. The highlight and shadow are fairly similar (slightly brighter highlights on the acetone one) but the mid tone separation is much improved.
I'm surprised there isn't a greater difference in speed. the light level may have dropped a bit on the second exposure so it's actually brighter than it appears. (another way to test would be to pour both pools of collodion on the same plate so exposure and processing are identical). Anyway, there IS a definite improvement. The 'restored' collodion flows more freely onto the plate - though I think the more obvious crepe lines are a result of inconsistent pouring on my part.
I would expect it to have fewer problems with peeling, though that tends to affect bigger plates so we shall have to see.
(UPDATE:  No, unfortunately  peeling is still a big problem on larger plates. We made this whole plate tintype the other day and it was fine until it came out of the wash and started to dry. The peel started in one corner and spread across the whole image in about 20 minutes. - Heartbreaking!

The general wisdom is to add some alcohol to the collodion - that's IDA (industrial denatured alcohol) for those of us in the UK. - I'll try that next...

At some point I'll try a side by side test of some different collodion recipes as I have a variety in stock. See the excellent wetplatesupplies blog for a very detailed comparison test.


Sunday, 1 April 2018

The Clifton Gorge Camera Obscura

While in Bristol recently I had to take the opportunity to visit the Clifton Observatory. Perched on the hill beside the Clifton suspension bridge the building is a former windmill, converted into a studio by an artist, William West in 1828. The following year he installed various optical instruments including a camera obscura.  For £2.50 the discerning member of the public can climb the tower and operate the camera obscura.

The lens is mounted in a rotating housing along with a 45-degree mirror on top of the tower. This means the horizontal view is projected vertically onto a 5 foot diameter table. The table is round and slightly dished to provide the sharpest image (simple lenses like this tend to have a rather curved plane of focus). There's a large handle to pull the mechanism around a track to alter the direction of view.
Viewing the image: I'm holding the direction handle to pan the camera. (Picture: catherine Roberts)
- and it's all utterly magical.  The view of the gorge and the bridge is the most impressive of course, with every change in the weather from sunshine to cloud accorded a drama and significance out of all proportion. Watching traffic and pedestrians crossing the bridge was fun, especially as there's a sense of clandestine spying.
The image on the viewing table. Lumps and bumps on the surface show it's hand made and has probably been repaired and repainted countless times.
Looking up: the lens assembly, guide rod and rotating track can all be seen inside the black wood panelled ceiling. - plus a modern smoke detector. 
Some strong gusts of wind made the lens housing shake, wobbling the image and reminding us that this was a live, real thing happening constantly, whether or not anyone was there to witness it. Other visitors remarked on how "clever" it is.  I think it's beyond that: A machine which is a combination of great simplicity and inspired design. - more of a definition of a work of genius.

 I adore camerae obscurae and this one is a gem. There are quite a few errors on the information board (it states that there are only three publicly accessible camerae obscurae in the UK* for example) but it's well worth a visit.

*Others include:
Eden Cloud Chamber. Eden Project, Cornwall.  Land artist Chris Drury has built a camera obscura from 120 tons of slate. The lens looks straight up to project the sky onto the floor.
http://chrisdrury.co.uk/eden-cloud-chamber/

Foredown Tower, Portslade, near Brighton/Hove. An old water tower housing a camera obscura.
http://www.brighton-hove.gov.uk/content/leisure-and-libraries/museums-and-attractions/foredown-tower-learning-and-visitor-centre

National Media Museum, Bradford (I can find very little about this on their own website bar a passing reference to it in one of their children's galleries but I have found accounts and pictures from visitors so it does seem to exist! do let me know if you have more info)
http://www.nationalmediamuseum.org.uk/planavisit/exploreourgalleries/magicfactory

Barrie Pavilion, Forfar, Scotland.   Situated in a cricket pavilion and run by volunteers.
http://www.kirriemuircameraobscura.com

Constitution Hill, Aberystwyth.  Allegedly the largest camera obscura in the world though I'm not sure what the measurement standard. They have a 14" diameter lens which is pretty big.
http://www.cardigan-bay.com/cliff-railway-camera-obscura-aberystwyth.php

Castle Hill, Edinburgh.  The first one I remember visiting as a child. Great views and a good guided tour as I remember.
http://www.camera-obscura.co.uk/camera_obscura/camera_obscura.asp

The Water Tower, City Walls, Chester.  Small and quirky by the looks of it.
http://www.grosvenorconstruction.co.uk/2013/01/23/camera-obscura/

Dumfries Observatory  Similar to Clifton in design and history
http://www.dumfriesmuseum.demon.co.uk/dumfmuse.html

Great Union Camera Obscura, Douglas, Isle of Man
http://www.iomguide.com/douglas/camera-obscura.php

Lacock Abbey, Wiltshire (while technically a camera obscura it's not room-sized, but a small box set into the window at the Talbot Museum) https://www.nationaltrust.org.uk/lacock-abbey-fox-talbot-museum-and-village/features/learn-about-the-history-of-photography

The Photographer's Gallery (a bit of a weird one as it's in a tube sticking out of the wall. The view rotates around a horizontal axis instead of the usual vertical axis)
http://thephotographersgallery.org.uk/camera-obscura-2

Portmerion Village. Wales  (NB: not advertised as open to the public but it does exist)
http://www.portmeirion-village.com

Greenwich Observatory
http://www.rmg.co.uk/see-do/we-recommend/attractions/camera-obscura

Lastly, take a look at a fictional one in one of my favourite films: A Matter of Life and Death starring David Niven.  One character has his own private camera obscura in his house. - see:


Sunday, 25 February 2018

Is Your Lens Properly Assembled?

... or a cautionary tale for DIY lens cleaners.

While it's unlikely many of us would even think about taking a modern lens apart, old plate camera lenses, particularly brass-bodied Petzvals are often filthy inside, plus they have those inviting serrated edges meaning you don't need tools to unscrew them and get at the glass.  It's usually no problem, provided you're careful and make an exact note of where and how everything fits together. This last part is essential - as I'll show...
(this does get a bit nerdy in places but stick with me)

My 'workhorse' camera for wet-plate work is a Watson studio whole plate from about 1917.  I bought it with a nice looking lens; a Cooke, no less bearing the name "No. 2 Cabinet Lens".
This Cooke lens is a typical brass-bodied portrait Petzval with built in lens hood.
Lovely hand engraving 
 

It's a Petzval design: about 8inches (200mm) focal length and about f/4.  The "Cabinet" designation suggests it should cover an area at least as big as a cabinet size carte de visite: around 6.5 x 4.25 inches. (this is 'half plate' size) 
This advertisement for Ross lenses shows something very similar:

The Petzval design is a compromise, giving good sharpness in the centre of the image with lots of brightness at the expense of quite a bit of softness at the edges. This is fine for most portraits and the 'swirly' bokeh effect the design gives is now highly prized.  I've always been a bit disappointed though, the edge falloff is very marked and unless it suits your subject the relatively small 'sweet spot' of sharp focus can be annoying.  It sure doesn't cover a cabinet size!
Collodion test picture (whole plate)  taken with the Cooke Cabinet lens: The fuzzy, swirly effect looks nice here but surely this lens shouldn't be this wild?

The Davidson Lens Measure

A recent addition to my collection of odd photographic gadgets is a Davidson Lens Measure. This has a clock-like dial and three pins: the two outer ones are fixed, while the centre one is connected to the indicator needle. On a flat surface all three pins are in line and the dial registers zero. If the surface is curved, the centre pin will be out of alignment. The gauge therefore shows just how strong a curve, concave or convex a surface has. It's used for measuring the curvature, and hence the strength of lenses.  Mine was cheap as it has a cracked glass, the needle is too short and it's not properly zeroed. I'll fix all of those things - (maybe!) one day but for now it gave me the idea to test my Cooke lens. If it had been cleaned and wrongly reassembled at some time this might be why it's now not as good as I expected.

As the Ross drawing above shows, the Petzval design has four elements: the front two are cemented together to form a plano-convex (or very nearly) shape which would be hard to reverse by accident. The two sides look very different and the rear flat surface would look very odd if it was facing forward. 
The rear set is different: there's a bi-convex element, an air space and a concave-convex element. There are several different ways these can be assembled and only one is correct.

Thomas Sutton’s “A Dictionary of Photography” from 1858 includes this in his description of the Petzval design:

The posterior lens is composed of two lenses separated by a small space; that next the front lens is of flint glass, convex-concave, and divergent, being thinner in the middle than the edges; the other is biconvex, and of crown glass, being placed with its most convex side next to the concavity of the flint…

This tallies with the Ross drawing above.  So how were my lens's elements arranged?
Cooke lens with rear elements, brass holders and spacers and the measure. The black thing is a Waterhouse stop for f/22.

Er.. certainly not in that order!  You can see my rough sketches in the picture above.  This lens had the biconvex first, then the concave-convex.  Easy enough to swap them over but according to Sutton, the biconvex isn't symmetrical. It bulges slightly more on one side than the other. This is hard to see with the naked eye but an easy job with a lens measure:
Measuring the lens curvature. The gauge isn't properly zeroed (it's actually registering this as concave!) but all I need here are the relative curvatures. It reads more on one side than the other so I know which side is which.
The measure made it easy to find the more convex side and turn it to "face the concavity" of the other element. A good clean of all the elements and everything went back together in the right order. 

Testing:

As a simple test I mounted the lens on my LSC 10x8" and loaded some darkslides with RC paper. Here's one made with the lens as acquired:
A: as found. Oh dear! sharpish in the centre but definition falls off fast.

-And here it is with the lens elements in the 'proper order:
B: Elements in the proper order as per Thomas Sutton's 1898 description.  MUCH better sharpness extending almost to the edge.

Just for comparison, I tried reversing the biconvex element (most convex side facing away from the other element):
C: Elements in the same order as B but with the rearmost element reversed. Only a tiny difference in the look of the lenses but a big difference in quality. It's almost as bad as the first one.

Lastly I tried something which works on some but by no means all lenses; removing the rear element set altogether:
D: Both rear elements removed.  The focal length increases as does the coverage - nearly all the way to the edges of the 10x8" sheet.

The effective focal length increased to about 11 inches and the quality is sharp and with good contrast all over. - worth remembering. Ansel Adams was very fond of his Cooke "triple convertible" lens which worked as different focal lengths depending on which elements were used and I have a Schneider Symmar 150mm that becomes a 265mm if you remove the rear set.  This doesn't always work but this shows it's worth trying!

What have I learned?

Firstly, don't take it for granted that an old lens is correctly assembled. When the parts are taken apart for cleaning it's very easy to put something back the wrong way round. Old Victorian lenses may have been apart several times in their lives.  This one even had signs of old modification work (drill holes etc.) in the brasswork at the back so it may have been mis-assembled for a very long time.

Secondly, by looking at the lens design drawings (or the closest you can find) it's possible to work out how the parts should go. Subtle differences in lens curvature may be hard to spot but unless an element is perfectly symmetrical it will make a difference. You don't need a lens curvature gauge (fun gadget though it is): look at the reflections in the lens surface:
 

Here are the two sides of the biconvex element.  The more curved side is on top in the right hand picture as the window reflection is smaller.  Yes, that is a horrendous chip out of the edge! - It's the cause of the chunk out of the image circles in the test images above.  Some people advocate painting such chips black to reduce flare.

Take a look at the edges of the elements, especially thick ones. Often the makers pencilled names or dates there which can identify otherwise unmarked optics.

Lastly, removing the rear elements can give you another longer focal length option. - OR if you really want the 'swirlies' you could deliberately move the elements around. This is what people do with lenses like the Helios-44 but that's a subject for another article.

Hope you enjoyed this. A bit of a nerdy post this time but it might just help you transform that clunky old lens back into the gem it deserves to be!
Monday, 15 January 2018

Cyanotypes on glass...

Hello everyone, this is my first post on here and thought I would share an experiment Bence and myself undertook last year exploring cyanotype and glass. As I couldn't find a great deal of information on this process anywhere we had to just experiment with trail and error. The first couple of attempts failed dramticaly, it was a method I had found online consisting of coating glass plates with pure gelatine and cyanotype solution, this all melted off and ended up making rather a lot of mess. We then moved onto using subbing solution to bond the cyanotype solution to the glass.


Plate No. 1
After a lot of failed attempts these are the first plates with the beginning of an image, plate no.1 is subbing solution mixed with normal strength cyanotype solution.


Cyanotype solution (part A & B mixed in equal parts)
Part A
Ferric Ammonium Citrate                              16g
Distilled Water                                               100ml
Part B
Potassium Ferricyanide                                  8g
Distilled Water                                               100ml


The subbing solution wasn't fresh and as you can see ended up leaving lumps of crystallised gelatine on the plate. 

Plate No. 2
Subbing solution (even when old) seemed promising as there was a vague image on plate no.1, so we started experimenting with different ratios of subbing solution and cyanotype solution, with varied results. Plate no.2 is fresh subbing solution mixed with cyanotype solution which is then poured onto the glass plate. This was then left to dry in the black and white darkroom for about four hours before exposing with a UV lamp. There is a more prominent image but the cyanotype chemicals became too diluted once mixed with the subbing solution thus creating a rather patchy photograph.

Plate No. 3
Plate no.3 is the same technique as plate no.2, mixing subbing and cyanotype solution together but this time we only added half the water (50ml instead of the normal 100ml) when mixing the cyanotype solution making it double strength as it would then be added to 100ml of subbing solution. This was an improvement but the cyanotype solution was still finding it hard to stick to the glass.

Plate No. 4

It was suggested we could try using albumen as this is used in the wet plate collodion process. The whole plate was first coated in albumen and left to dry. After completely dried three solutions were applied in order help adhere the cyanotype to the glass. Split into thirds from left to right, cyanotype double strength solution mixed with albumen, cyanotype double strength solution mixed subbing solution, cyanotype double solution alone.


By coating the whole plate first the second solution had something to stick to creating a more even and detailed result. The albumen has created small bubbles all over the surface of the plate, making the final image very grainy, so we decided to try subbing solution for the initial coating before applying the subbing-cyanotype solution.

Plate No. 5


This plate has been coated with a layer of subbing solution that we let dry, then coated with the cyanotype double strength solution mixed with subbing solution and poured onto the surface to create a thin, even layer.


Plate No. 6


Plate no.6 was to test the exposure times for the solution, starting from the right hand-side in 5 minute intervals. 10-15 minutes seems to be the best exposure bracket for this image. 


Plate No. 7


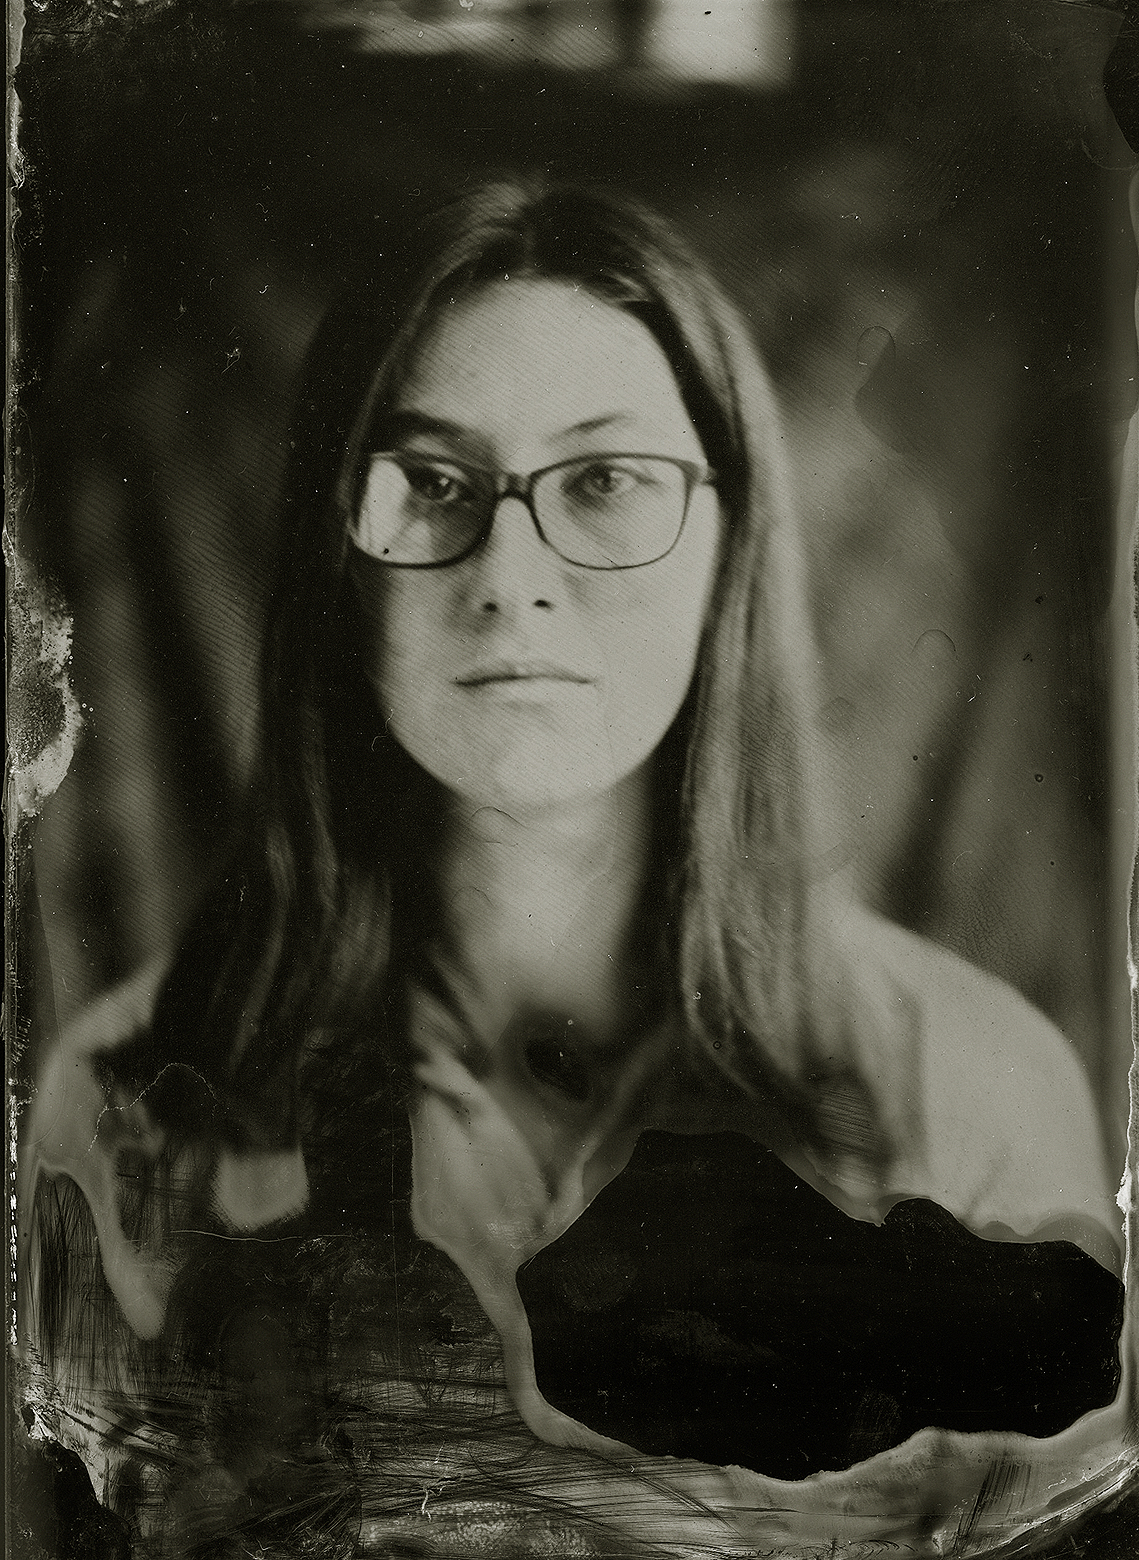
At 12 minutes this exposure was a little over, the detailing on the face and ears are lost due to being overexposed.


Plate No. 8


The final process - coat the plate in a thin layer of subbing solution, once dry pour a thin coating of subbing/cyanotype double strength solution and allow to fully dry in the dark for around 12 hours.


Exposure was 8 minutes under a UV lamp.


The right hand-side of the plate was propped up on a piece of kitchen towel while drying which absorbed most of the solution resulting in lost of image. I actual think this "happy accident" adds to the final photograph, highlighting the process involved to create it.