Tuesday, 17 July 2018

The £3 infra-red camera: (a DIGITAL article - shock!)

-Yes, but I'd argue iit qualifies as an "alternative" process as it really messes with the pixies in an experimental way and not simply in post-production.

This is something I’d wanted to try for ages - hacking a digital camera to make it sensitive to infrared light. There are various tutorials online and the results look promising.

Hacking a digital camera is easy -in theory..

The basic procedure for making an IR digital camera is simple: remove the filter which covers the sensor. The difficulty is getting at it without messing up the delicate (some might say flimsy!) stuff inside the camera.  Typically they are full of small circuit boards, connected by ribbon cables, ultra-thin wires and snap-together plastic doodads, all folded and wrapped around each other in ways hard to follow and easy to damage.  As this is unlikely to be a reversible procedure I did what others recommend: Start on a cheap compact camera from a charity shop, so it’s not a big deal if you wreck it. (Access is potentially easier on DSLRs but you’ve got to be brave or very wealthy to do one of them)
Poor innocent Canon compact on the operating table...

So here's my victim; £3 worth of Canon Powershot A570. 7.1 blazing megapixels and a ton of features. Very nice if you like that sort of thing.  Having checked it works OK it’s time to delve inside.
I won’t make this a ‘how-to..’ guide as every camera will be different but here are some general points, and things I learned along the way:

1. Look at YouTube or Instructables etc. for instructions on how to take your model of camera apart. It can save a lot of time looking for hidden screws or stop you breaking something by accident.

2. The flash runs off a VERY HIGH VOLTAGE capacitor which stores a charge even when the camera is switched off.  This can give you a very painful shock or even burn you so discharge it before you begin:
Before you start, set the flash to ON, take a picture, and instantly open the battery compartment. This stops the flash from recharging and makes the camera safer.   As an added safety precaution leave the camera with the batteries removed for a day or two before dismantling to allow any stored charge to dissipate.

3. Dismantle the camera, taking care to store the tiny screws logically in sets and take lots of photos as you go. Trust me: - you won’t remember where every wire, tab, flange or clip fits when it’s time to put it all back!
this is about halfway through the strip-down. These things are complicated!

4. Take great care. Don’t pull, bend or force anything. These things are really not designed to be taken apart.  If at all possible don’t pull any ribbon cables off connectors, even if they appear to have re-connectable  plugs. In my experience they don’t like it!  Try to disturb as little as possible  as you gain access to the sensor. On this one I reached it from the back of the lens turret but I had to move the screen and three circuit boards out of the way just to get access to the screws holding it in.

This is what you’re looking for: The sensor and the infrared filter which covers it. Carefully remove the filter glass, leaving any spacers or gaskets in place. The sensor needs to go back in exactly the same position.  If it’s out by even the thickness of a gasket the camera won’t focus properly. Don’t touch the sensor but gently blow any dust off it before reassembly.


Here’s the filter. Only a tiny piece of glass but it blocks the infrared wavelengths from the sensor and ensures the camera has a ‘natural’ colour response. 

Reassembly is the reverse of removal (as it says in all the best manuals) - but it’s time-consuming and fiddly. Take as much care as you did when dismantling things and ensure everything is seated properly before tightening the screws, otherwise you can easily crack a component and ruin the whole camera. Once you’ve got it all back together without too many screws left over :-) reinstall the card and batteries and try it.
Test shot with the camera reassembled
This hideous colour is a sign of success. The sensor is now seeing all wavelengths including the infra-red which the filter was blocking. This Canon allows a custom white balance but simply trying the various options (daylight, tungsten, flash etc.) goes through a good range of options. Choosing the setting where the colour looks most normal gives more scope and gradation in post production.

The image is bit over-exposed but that can be compensated. Converting to black and white in Photoshop and biasing the conversion to the reds a bit gives a good, strong infra-red effect.

Here's the same scene shot in different ways:
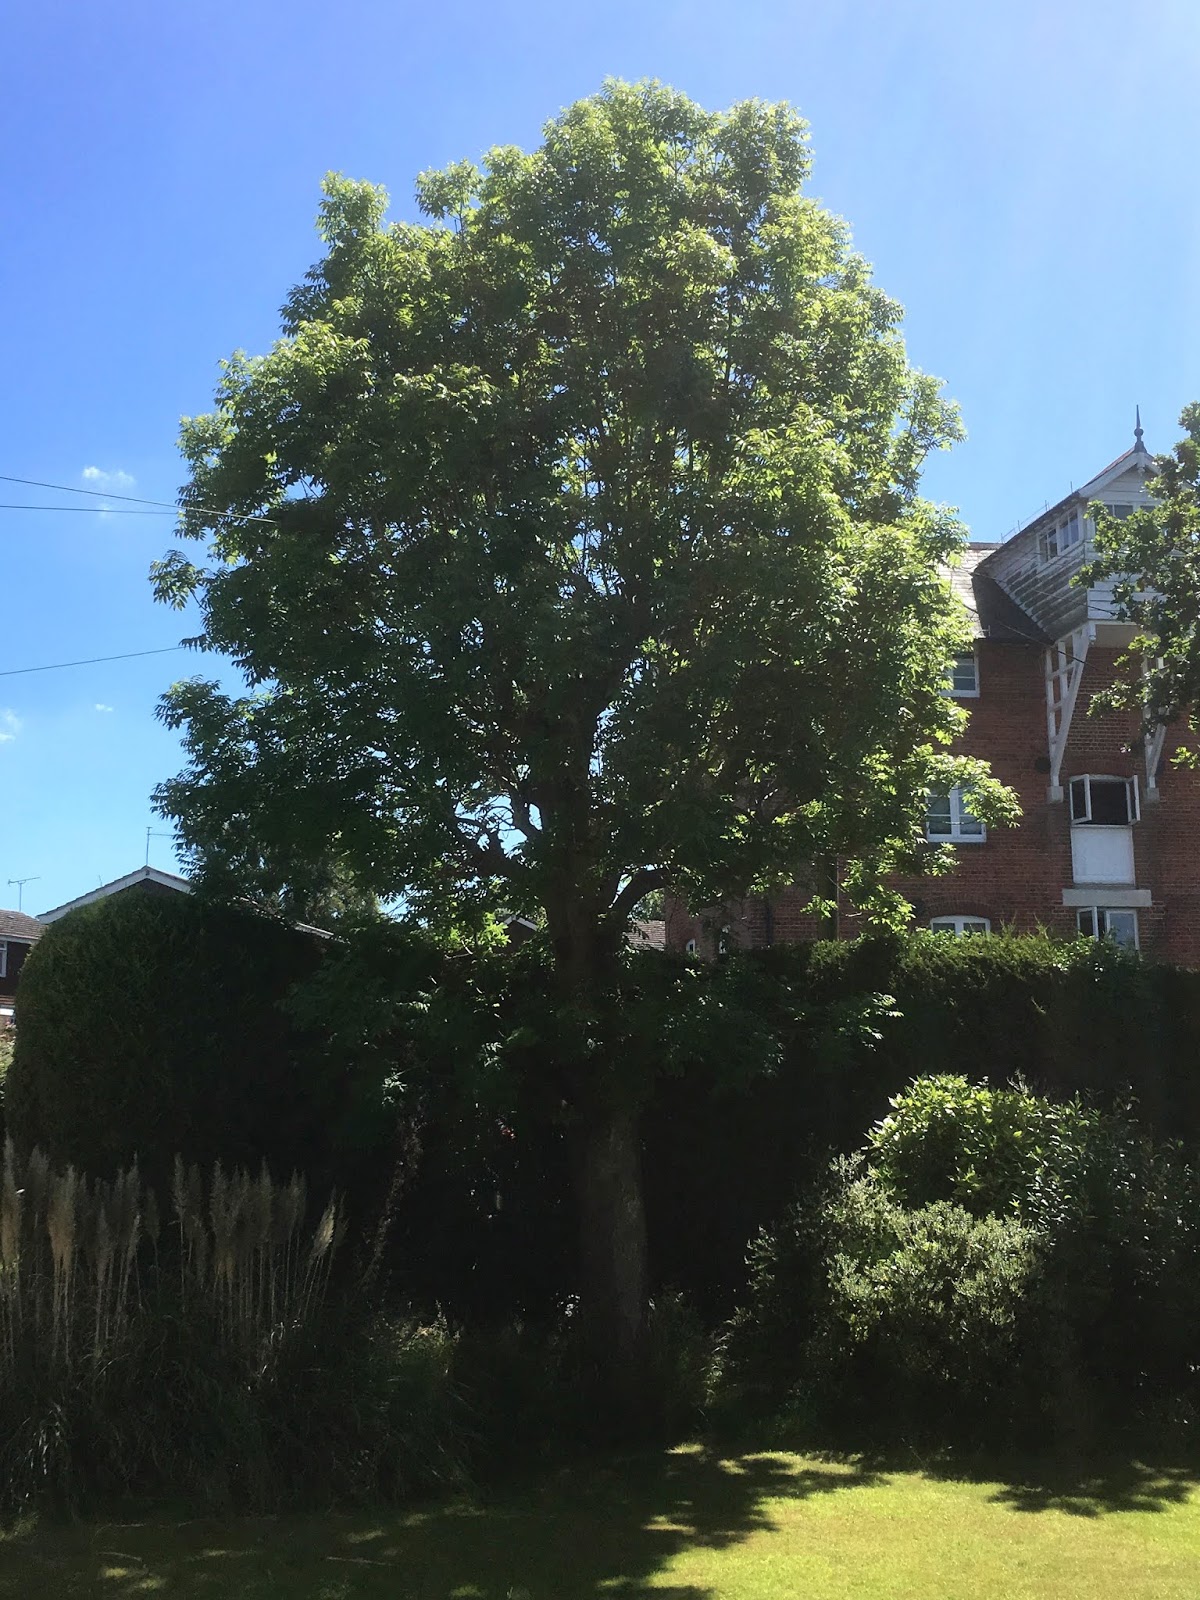
'Straight' digital photograph with no infrared (actually shot on my iPhone as the Canon can no longer do this)

No filter on the lens but "custom' white balance selected on camera. The mildest effect but still a long way from 'natural' colours.
A strong red (Kodak no.29) filter gives some very odd colours - the foreground grass and foliage are almost normal green but with a white tree and orange sky

Using a dedicated IR filter (Ilford's SFX filter) gives near-monochrome straight from the camera


 You can barely see anything through a dedicated infrared filter as it cuts out almost all the visible spectrum. The converted camera loves it though. Here’s another picture using the SFX filter:
Ilford SF-X filter plus B&W conversion in Photoshop
Interestingly, hitting "Auto Colour" does a pretty good job of expanding the tones. That's all I did to the picture above, followed by doing the bog-standard "Mode" conversion to black and white- not even bothering to tweak the response. there's a lot more potential for making high quality images but for the moment I'm still just a kid with a new toy...

Infra-red photography is interesting as the camera sees totally differently. Foliage reflects a lot of IR so it records as light, almost white. Blue skies and water have very little IR so they record as very dark. An overcast sky is ‘warmer’ as the clouds reflect quite a bit of IR. After a while you get better at predicting what the images will look like but it’s not really for Zone System previsualisation techniques!  It’s good fun and has quite a bit of potential though.

Finally here are a couple more made with a piece of Kodak Wratten No. 29 (deep red) gel filter:

The curious dual sky colour is how the camera rendered it. 

Quarr Abbey, Isle of Wight 2018.

I find the orange/green colours a bit much. - Here's a B&W conversion.
I'm not sure what caused this curious blur/streaking effect but it may be over exposure or over heating of the sensor
I've got several images which show this blurring effect. It seems to be on the pictures where the light and ambient temperature were very high. My best guess is without the protective filter too much heat (and therefore infrared) overloaded the sensor. - I'll do more experiments to find the cause but it's not necessarily a defect: - just an alternative outcome.  See the deliberately exaggerated pixellation below. Who says you can't have 'happy accidents' with digital?

Round the Island Yacht Race, July 2018

Friday, 15 June 2018

World Wet Plate Day 2018.... Was it just me?

World Wet Plate Day is an opportunity for the global community of wet plate artists to celebrate their medium by making and sharing pictures made on a specific date: usually the first Saturday in May.

It's a good way to kickstart some springtime activity for those of us who tend to make fewer plates in the winter.  Last Year Annie Haggarty 'christened' her new studio/darkroom by making some plates for WPD  and this year I decided it was time I made a properly big plate: the full 12"x15".

I had some glass cut to size, I'd made the helper tray and silver sensitising tank, and amassed the necessary £300-worth(!)  of silver nitrate needed, I just needed an impetus to get started. Wet Plate Day is also the start of the bank holiday weekend in the UK so I had some free time.

12"x15" is quite an increase in scale from whole plate or 10"x8" . It's roughly the same as A3 so it's more than twice as big.  You use a LOT of collodion on each pour - even if you don't drip any from the edges and the weight and sheer unwieldy size makes it quite an effort.  Pouring isn't as difficult as might be expected. The bigger puddle flows more controllably than on a small plate somehow but you do need to avoid letting it spill over the edges or you lose a lot very quickly.  The collodion takes a little longer to 'set up' - that is to become slightly tacky so it doesn't come off in the silver- probably because there's a lot of ether about (ventilation is very important!)

I made some test exposures recently using one of the oak trees in the garden.  I love the little micro-environments around the bases; full of ferns, ivy and grasses and the super detail of a big plate is ideal to render this stuff. Here's my first 12"x15" Ambrotype:
this will do for a first attempt at an ultra-large format ambrotype.
My 12x15" camera has a 520mm Berthiot Paris 'Special Aviation' lens which is pretty fast (f/6.3) and very crisp as you'd expect from a reconnaissance lens. -It's no swirly romantic Petzval!  It has a character all of its own and is very rewarding and inspiring to use.  Now to upload it to the World Wet Plate Day site...

.. Except it doesn't seem to exist for 2018!
2017 and previous years are all there at http://www.wetplateday.org but nothing, not even a date for this year. Shame.  Never mind, it made me get out and make the work which is the important part.

Update: 28th May 2018: The Wet Plate Day site now says "currently moving servers" and there's some stuff on social media  about next year: May 4th 2019 so I guess this year was a bit of a hiatus for the organisers. Hopefully next year it will be back in full -(and on a proper website as I don't succumb to the tyranny of F**ebook or similar stuff ;-)

Some final thoughts on ULF (ultra large format) collodion:
It IS worth the aggravation and expense: A really big ambrotype is an astonishing thing, even when made by my inexpert hands. Exposure tests can be made with smaller plates (once you've poured a big plate, smaller ones suddenly seem much easier !).  Glass cleanliness and good collodion are even more important, as old collodion can easily shrink by 2.5%.  -which doesn't sound much until you realise that across 15 inches it means a split of more than 9mm.

I made more 12x15 plates over the bank holiday weekend. There will be a series on the trees and the things growing on and around them later this summer. - here are a few samples:


Saturday, 28 April 2018

UCA collodion sessions for 2018. Best Hats Yet!

I've just finished the third day of workshop/demos for UCA students. We made some great plates, thanks to a wonderful new (actually 100 year old) portrait lens, good weather and most importantly some creative, enthusiastic and inventive people who really got into the spirit of things. Thanks to everyone for making these: a real team effort as always.

The first day was for year 2 BA Photography. Here are the plates. Mostly half-plate ambrotypes:


Sadly Emily's last plate, a whole plate tintype fell victim to the old collodion shrinking as it dried. The odd thing was that we made a couple of other whole plates and they didn't peel. Maybe too long 'setting up' between the pour and the silver nitrate? I'm not sure but it's a reminder of how fickle this process can be. The learning curve is endless.


The next session was for MFA students. Corinne brought some great dressing up stuff and everyone made a real effort to transform themselves for the camera:


The set-up in the finishing room: Note the head brace to help the sitter keep still. (photo: Hayden Wilde)


Corinne has a go at pouring a plate. I was impressed with everyone's skill at this tricky operation. (photo: Hayden Wilde)


The hat needed a little adjustment! (photo: Hayden Wilde) 

Su Ji posing for the 12"x15" plate camera. Note how the orange feathers record as black in the Ambrotype. (photo: Hayden Wilde)


Hayden was the super-assistant for these shoots. We made this whole plate tintype as a small token of thanks.

The following day, the remainder of the MFA people came for their session. Again, some great hats, inventive use of props and original styling and poses:


The mirror Danielle is holding has solarised: - a beautiful effect.


Thanks to everyone who took part. Looking at the smiles in all the production shots it's clear you all enjoyed it as much as I did.

Thanks once again to Hayden. His hard work and super-efficiency were very much appreciated.

Thursday, 12 April 2018

A Cure for Old Age! - (for collodion at least).

Collodion doesn't have a great shelf life. Even if kept in the fridge it deteriorates over time.  As the solution ages, it darkens in the bottle from a light straw colour to a deeper orange, almost red.  Old 'red' collodion can still be useable but the sensitivity is generally much reduced and the contrast is higher.  Some people use it to their advantage, using red collodion when they need more contrast or mix it with fresher solution for a custom coating but most of us accept that like conventional photo chemicals it is best to use the stuff up before it goes 'off'.

Recently however I've come across a couple of references to the use of acetone to resurrect old collodion. Quinn Jacobson mentions it and there's a great account on the Collodion User's forum by Tara Oliphant (www.derivedlogic.com)  which recommends using 0.5ml of acetone per 75ml of collodion to restore it. This works out as 6.66ml per litre or 0.0066%. - say .007% for the real world.

As I've got various bottles of elderly stuff lurking in the fridge I tried it. 

The old, red collodion I tested is some of John Brewer's own-recipe positive stuff which must be at least a year if not two years old. (dating the bottles when they are new is a good idea) It's been stored in a fridge at approx. +5deg. C and it still works, though it tends to crack and flake sometimes on larger plates (it's noticeably thicker when pouring).

As per the recipe I added 1.7ml (should be 1.66ml but that's hard to measure accurately!) of acetone to 250ml of collodion. This is a tiny amount: less than 1%of the volume. I doubted anything much would happen but after only an hour the colour had already improved!
After 1 hour the acetone has already lightened the collodion...
Another 9 days in the fridge and it looked almost brand new.  I'd expect the conversion to be quicker if the stuff is left at room temperature but I prefer to keep it safely stored in the airtight fridge.
After 9 days (in the fridge) the treated collodion has reverted to its original colour

Testing.

Side by side tests made under the same lighting conditions - or as best I could in daylight. flash is more consistent but I seldom use it in my wet plate work and I wanted a relevant test result.
For the record these are quarter plates and the lens is my 5" magic lantern petzval.

I established the best exposure for the old red collodion as 6 seconds at f/3.  I kept the exposure the same for the treated collodion (it was a dull day and the light was pretty stable) Here are both plates:
untreated old 'red' collodion. 6 sec f3
same collodion treated with acetone. 6 seconds f3
Interestingly, even though older collodion is supposedly more contrasty the treated stuff has better range. The highlight and shadow are fairly similar (slightly brighter highlights on the acetone one) but the mid tone separation is much improved.
I'm surprised there isn't a greater difference in speed. the light level may have dropped a bit on the second exposure so it's actually brighter than it appears. (another way to test would be to pour both pools of collodion on the same plate so exposure and processing are identical). Anyway, there IS a definite improvement. The 'restored' collodion flows more freely onto the plate - though I think the more obvious crepe lines are a result of inconsistent pouring on my part.
I would expect it to have fewer problems with peeling, though that tends to affect bigger plates so we shall have to see.
(UPDATE:  No, unfortunately  peeling is still a big problem on larger plates. We made this whole plate tintype the other day and it was fine until it came out of the wash and started to dry. The peel started in one corner and spread across the whole image in about 20 minutes. - Heartbreaking!

The general wisdom is to add some alcohol to the collodion - that's IDA (industrial denatured alcohol) for those of us in the UK. - I'll try that next...

At some point I'll try a side by side test of some different collodion recipes as I have a variety in stock. See the excellent wetplatesupplies blog for a very detailed comparison test.