Cyanotypes on fabric are simple, right? You soak the cloth in the solution, let it dry and then expose/ rinse in the same way as paper. Man-made fibres generally don't work, but natural ones like cotton, linen or silk are good.
Well, up to a point. Last year my attempts at making a flag for World Cyanotype Day were thwarted when all my exposures resulted in pale, wishy-washy tones (that and my leaving things to too late to re-test). I'd been using old cotton bedsheets: Normally an excellent substrate as they are natural fibres and have been washed countless times so there are no other chemicals present. Clearly this sheet was a bit different, perhaps with some polyester or something in the fibre mix? I didn't worry too much, just tested samples from all the sheets I had (we have a stock of them for painting dust sheets etc.) and found which were the 'good' sheets and which 'bad'.
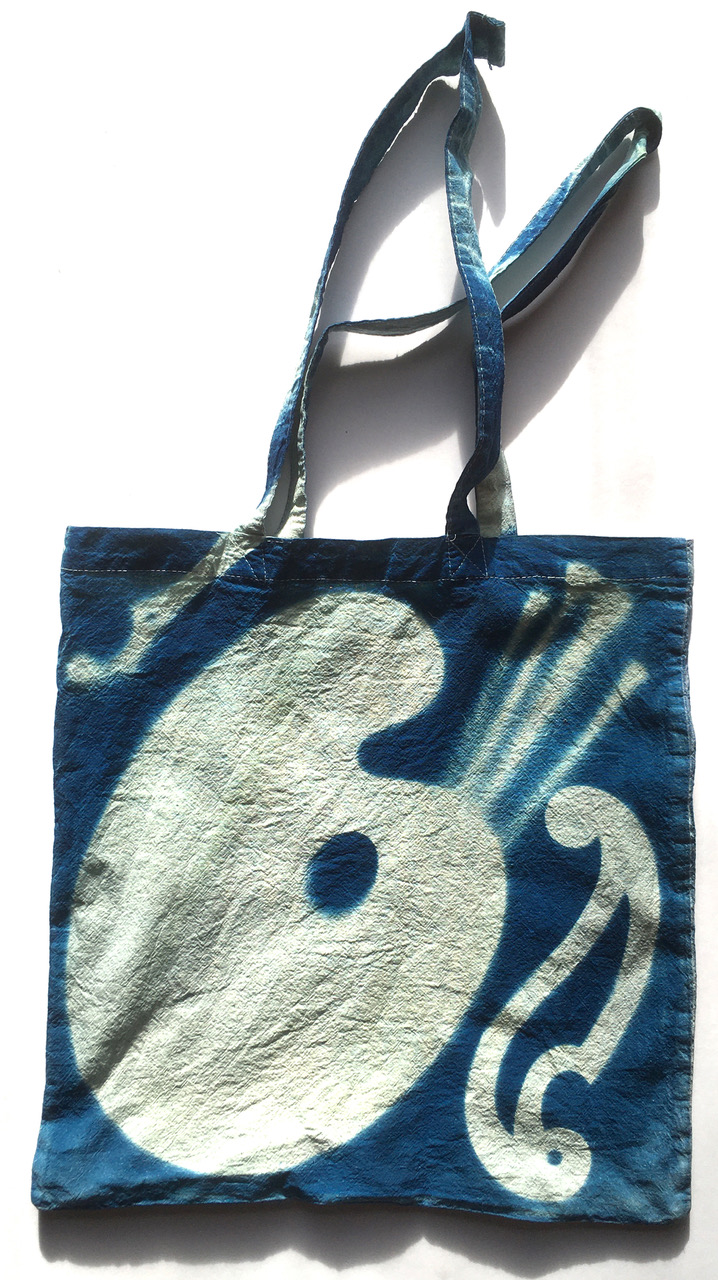
Recently I had the idea of making a couple of cyanotype bags for my mother's birthday. I'd sent her some pre-coated paper to entertain her in last summer's lockdown and I know she liked the colour and the process. I'd send one completed bag and another sensitised by unexposed for her to create her own.
Cotton/Linen tote bags are cheap online: Less than £1 each from several UK sellers. I had no idea how pure the material would be but I wasn't expecting much at the price. Worth a go, though.
The bags from Ebay looked and felt surprisingly good. Nice, thick material and well stitched. When I tried wetting one the water just rolled off the surface! - clearly quite a lot of chemical 'sizing' or something left over from the manufacturing process. This isn't surprising. I'd never try and coat brand new fabric with cyanotype without at least washing it once to remove that stuff. I put the bag in the washing machine and gave it one 30 degree wash cycle - plus an extended rinse.
Coating the fabric.
It makes sense to 'dunk' large pieces of fabric in the solution as you get fully saturated, even coverage but it's messy and the fabric drips extensively. For small pieces I prefer to lay them flat in a tray and brush it on. The cotton/linen material absorbs it very readily and when I turned the bag over, much had wicked through to the other side already. A bit of extra coating on the seams and handles and I hung it up to dry.
Exposure.
I should have made test strips of course but instead I just forged ahead with a guessed exposure. The nice thing about having your own UV Box is that the light is always consistent so I knew 4 minutes was a good time for paper-based images of opaque subjects. I covered the bag with pairs of scissors (astonishing how many I collected from around the house, studio & darkroom) and gave it the 4 min each side.
First attempt: a qualified success.
 |
| 1st bag: Washed in the washing machine and then coated |
The result was OK - but not the super-rich Prussian blue that I really love. A dash of Hydrogen Peroxide in the final rinse water accelerates the darkening effect which occurs naturally over the day or so following exposure of a cyanotype but this was clearly as dark as it was going to get. Hmmm....
Time to Science the **** out of this stuff. (as Matt Damon says in "The Martian")
My gung-ho 'quick wash and go for it' fabric preparation had worked, but a bit more scientific testing of methods was needed. I cut another bag into test strips and pre-treated them in a variety of ways:
1. No treatment at all. - not even a pre-rinse (how bad can it be straight from the factory?)
2. A machine wash at 60 degrees. (do hotter temperatures remove the sizing?)
3.. Three machine washes at 60 degrees. (do multiple washes make a difference?)
4. 1% Oxalic acid (based on an educated hunch: Cyanotype supposedly favours mildly acidic conditions, Oxalic acid is a useful degreaser and cleaning agent - and I had plenty of the stuff ;-)
5. Alum (potassium sulphate) mordant. (as used by dyers to prepare fabrics for natural dyes. A mordant allows dyes to bond with the fibres more effectively)
6. Soda Crystals (sodium carbonate). (The stuff sold for unblocking drains etc. The theory being that if the problem is some kind of oily/fatty material in the fibres the soda will dissolve it effectively)
All the strips were exposed together, in 30 second steps from half a minute to six minutes and...
 |
| test strips: 30 sec (bottom) to 6 min (top) |
The alum mordant is most effective. The depth of colour and clean contrast are great. The oxalic acid was surprisingly good too. The rest were pretty poor. Interesting that no treatment seems better than the washing machine. - I suspect what may be happening there is despite the hot washing, the machine rinses with cold water which apparently 're-fixes' the sizing back into the fibres. Washing powder does however remove the cream colour of the 'unbleached' fabric effectively.
Here's how I used the alum mordant:
Weigh the dry fabric. Measure out 20% of that weight in alum. dissolve it in hot water in a large stainless steel pan or bucket. The amount of water isn't critical but enough to cover the fabric. Place the fabric in the hot solution and heat it on the stove until it simmers for 5 min. Then shut the heat off and leave overnight (8 hours or more). Lastly remove the fabric and rinse in warm water before hanging it up to dry. (NB: you may not need to to dry it before coating with cyanotype sensitiser but this way I ensured there was no water left in the fabric to dilute it)
This is my oxalic acid recipe:
1% oxalic acid = 10g per litre of distilled water. (enough volume to cover the fabric comfortably) Distilled might not be necessary but as cyanotype can be fussy over water quality I played it safe. I sloshed the fabric around in the mixture for 10 minutes, then rinsed it briefly before drying. (see above).
 |
| soaking bags in a bucket of alum solution |
One more thing:
The accepted wisdom (indeed I've put it in my own manual) is to make cyanotype sensitiser for fabric at a slightly weaker dilution than the paper recipe. The great Christopher James recommends 20g per 100ml water for ferric ammonium citrate and 8g per 100ml water for potassium ferricyanide. - and who am I to argue? the theory is that you can economise a bit as the solution is more readily absorbed. However, just to try one more test, I made up another test strip, mordanted with alum and coated with the 'standard' chemical recipe of 25g per 100ml water for ferric ammonium citrate and 10g per 100ml water for potassium ferricyanide. Here's the result.
 |
| Top: more concentrated chemistry (see text) Bottom: 'fabric dilution'. both Alum mordanted |
The higher concentration "standard" formula shows a definite improvement. I also extended the time range (all the way up to 12 minutes) to see if more exposure helped. The answer is not really. - 4-5 minutes is sufficient to get a 'D-max (maximum density) so that's what I settled on.
Here's a finished "scissors" bag made with alum mordant pre-treatment and standard formula (ie not dilute) sensitiser.

Finally here's Mum's bag. Made for her to carry her painting things. I had some fun with it!